Week 14: Interface & Application Programming

Networking & Communications
In this week, we focused on the interface between the computer program and the user interface. This means what the user sees and how they can control a computer program with it. Many user interfaces are visual (such as apps and software interfaces). However, they can also be controlled via voice (like with Alexa, for example). There are many different coding languages that can be used to program the visual environment (e.g., HTML or JavaScript).
In our local class, we looked at many examples, which was very inspiring.To tackle the task, I wanted to generate an input using my own boards. Therefore, I took one of the touchpads and connected it to the computer.
SAMD 21
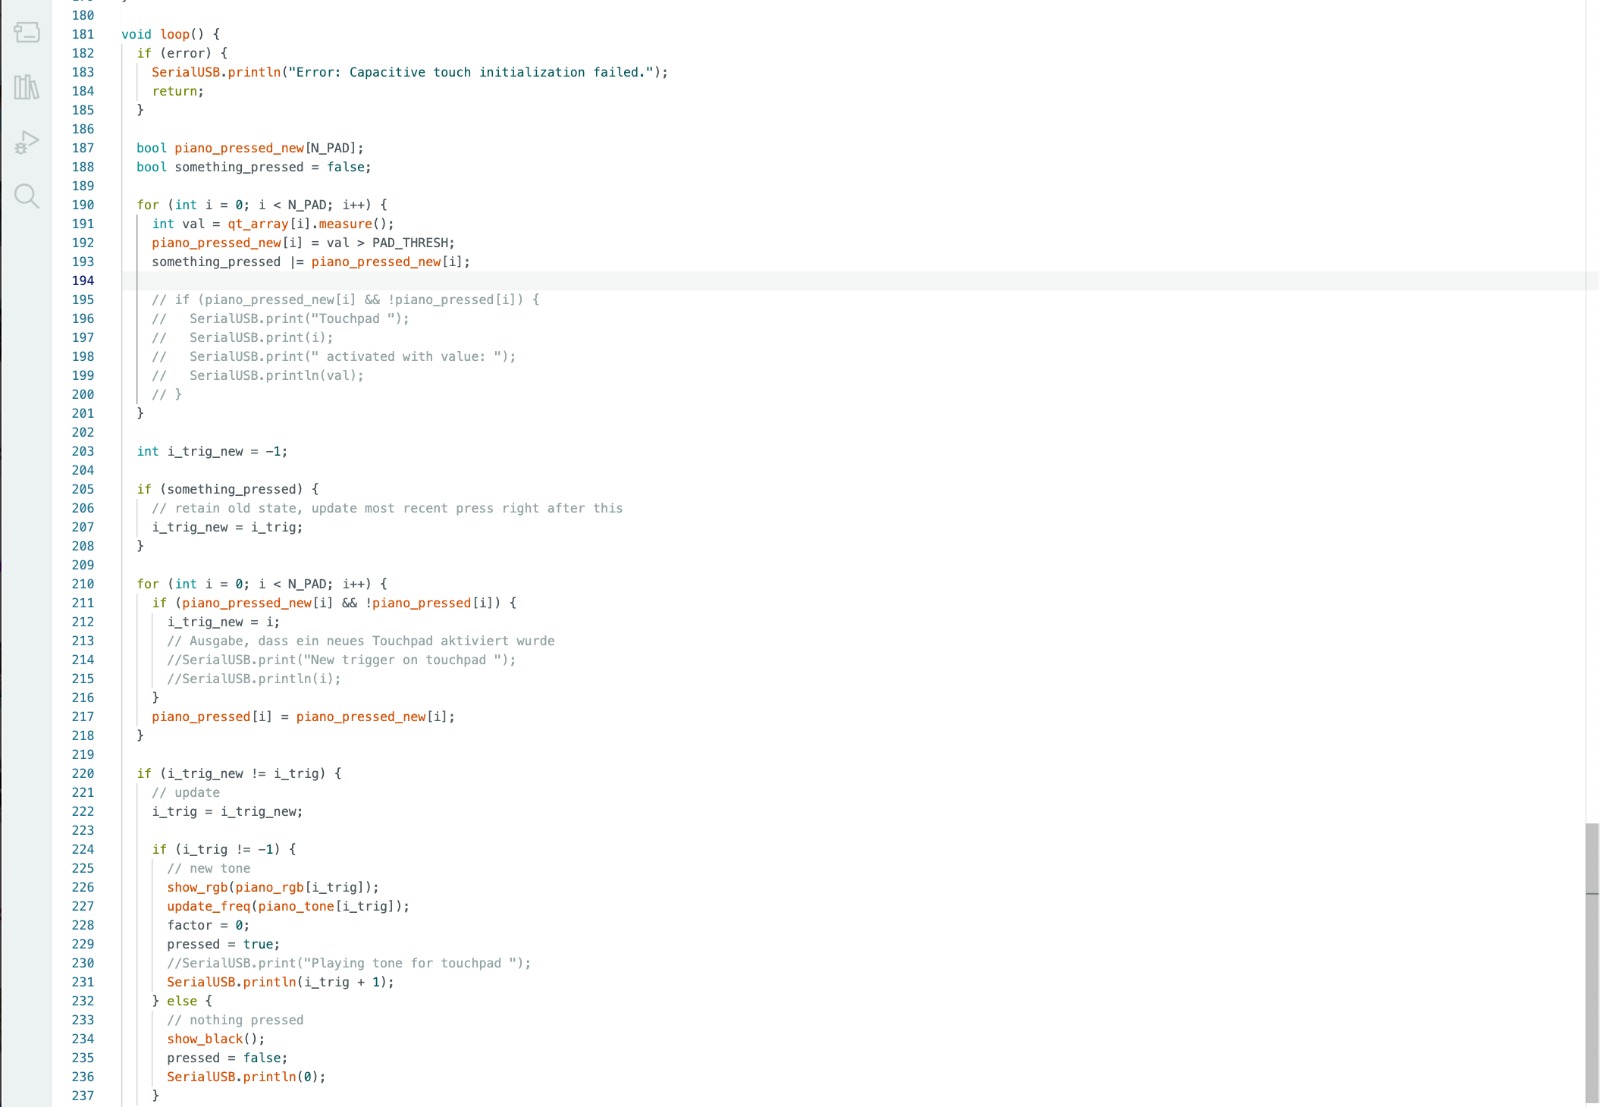
I took the code from my piano and modified it to become serial so that I could communicate with Processing.
I uploaded the code to my PCB and was then able to read whether a touchpad was pressed or not.
For this, I used the Serial Print function. Initially, I queried too much information over serial. My tutor later told me that I should always make sure to only query the functions we really need for what we want to do. This simplifies the code, and thus the code that needs to be read by Processing is also simpler. I then adjusted it. The code you see here is the simplified code that reads whether the pad is pressed or not.
PROCESSING
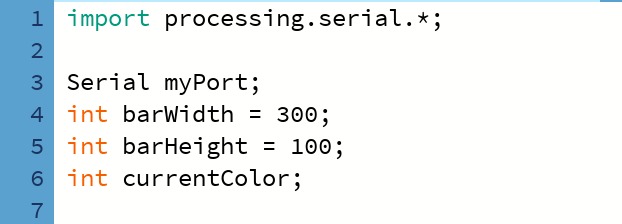 Next, I defined the width, height, and color of the bar that would later appear on the screen.
 Next, I defined the window size in which the bar is displayed.I then defined the serial connection to my board by specifying the port and the baud rate, which must match the baud rate defined in the Arduino. The initial color was set to white.
 I specified that the background color of the bar should be black and that a bar should be drawn in the current color.
 Here, the code checks if data is being received. Additionally, the code converts the serial data sent from the Arduino into numeric data to prevent any errors during data transmission (conversion via the ASCII table).
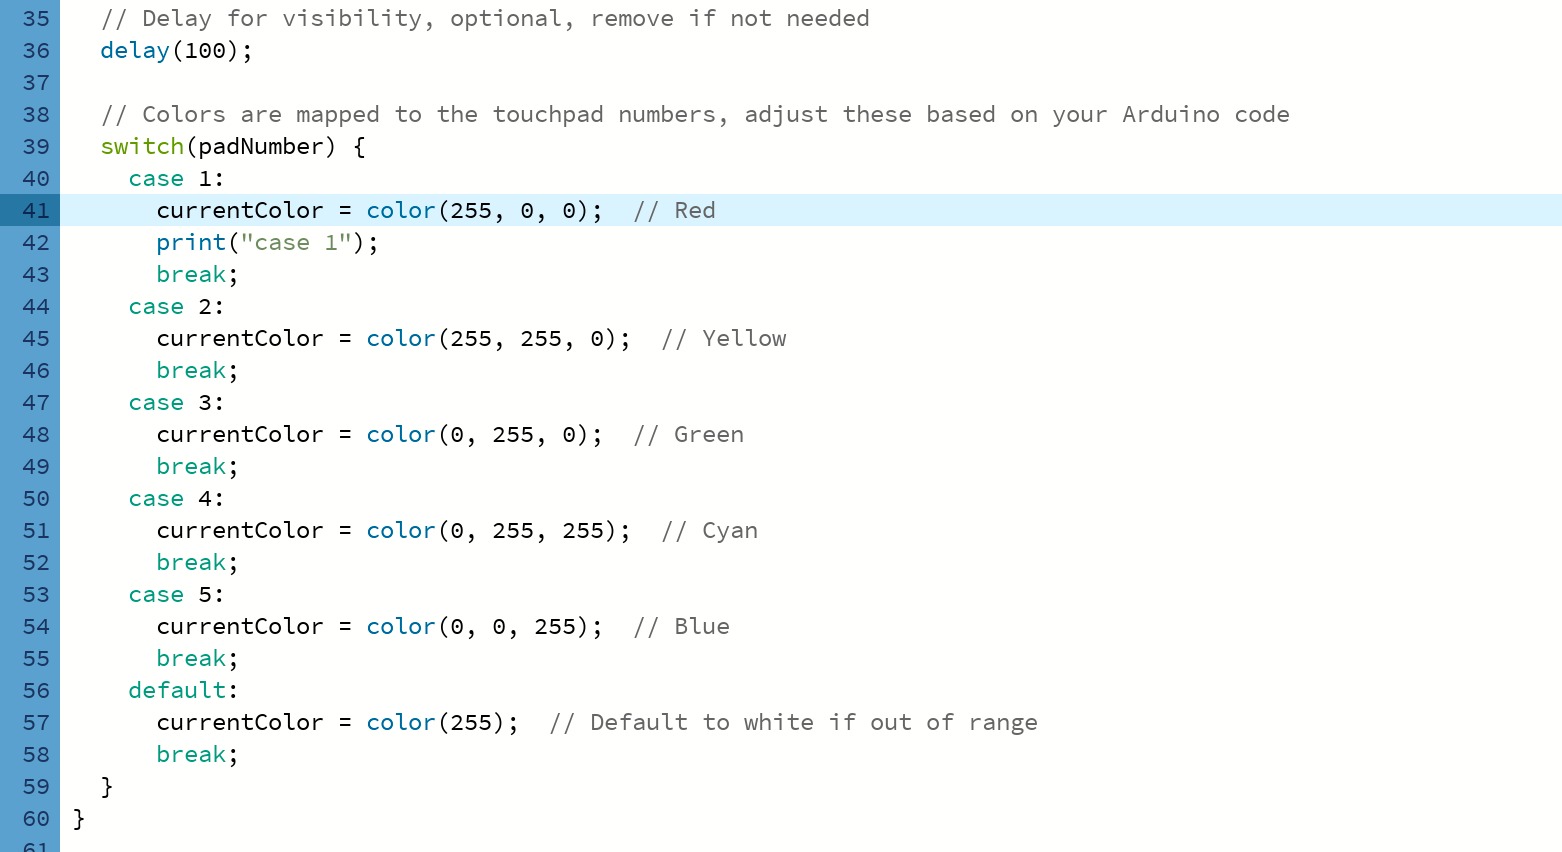
It was specified that the color should change to black when the pad is no longer pressed. I added a delay to slow down the sequence. I entered color values for the individual pads.